Administrator Guide
Step-by-step interactive documentation to help you configure, secure, and monitor your API Gateway infrastructure.
Step 01
Secure Authentication
-
Access the Portal
Navigate to your API Gateway's admin directory (e.g.,
/admin/index.php). This portal is strictly protected. - Enter Credentials Input your administrator username and password. Ensure you are using the credentials provisioned during the system setup.
- Authenticate Upon successful login, your session is securely established and you are redirected to the live metrics overview.
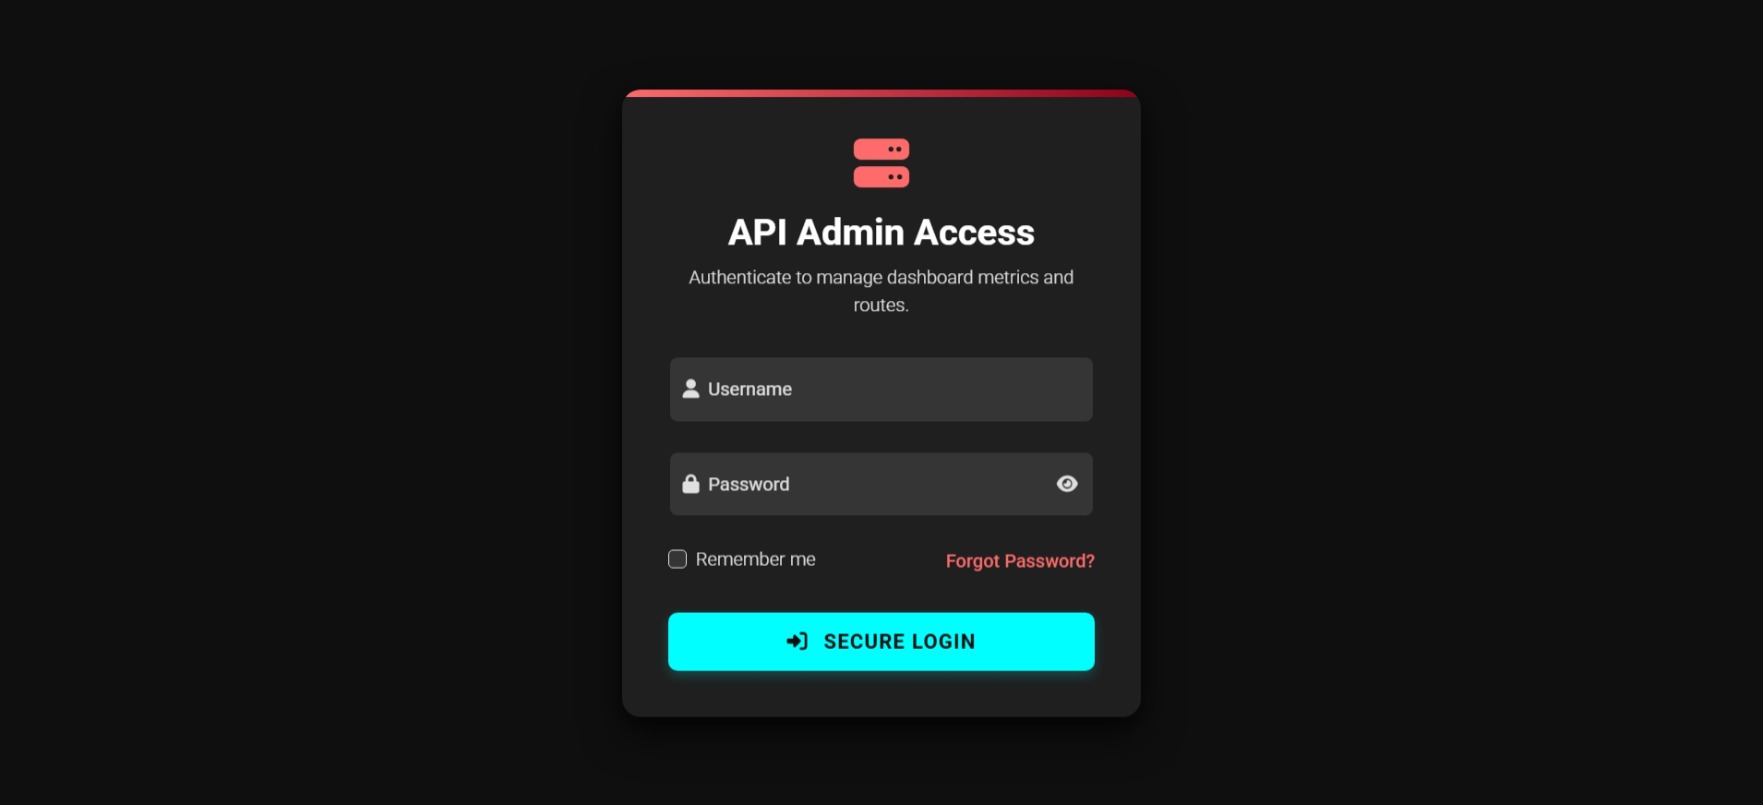
Secure Login Interface
Step 02
Live Metrics & Analytics
- Global Overview Immediately assess the health of your API with aggregate statistics: Total Requests, Average Latency, and Active Tokens.
- Real-Time Traffic Graphs The 24-hour chart provides a visual breakdown of incoming requests segregated by HTTP methods (GET, POST, PUT, DELETE).
- Performance Bottlenecks Review the path-based latency breakdown to identify exactly which upstream microservices are responding slowly.
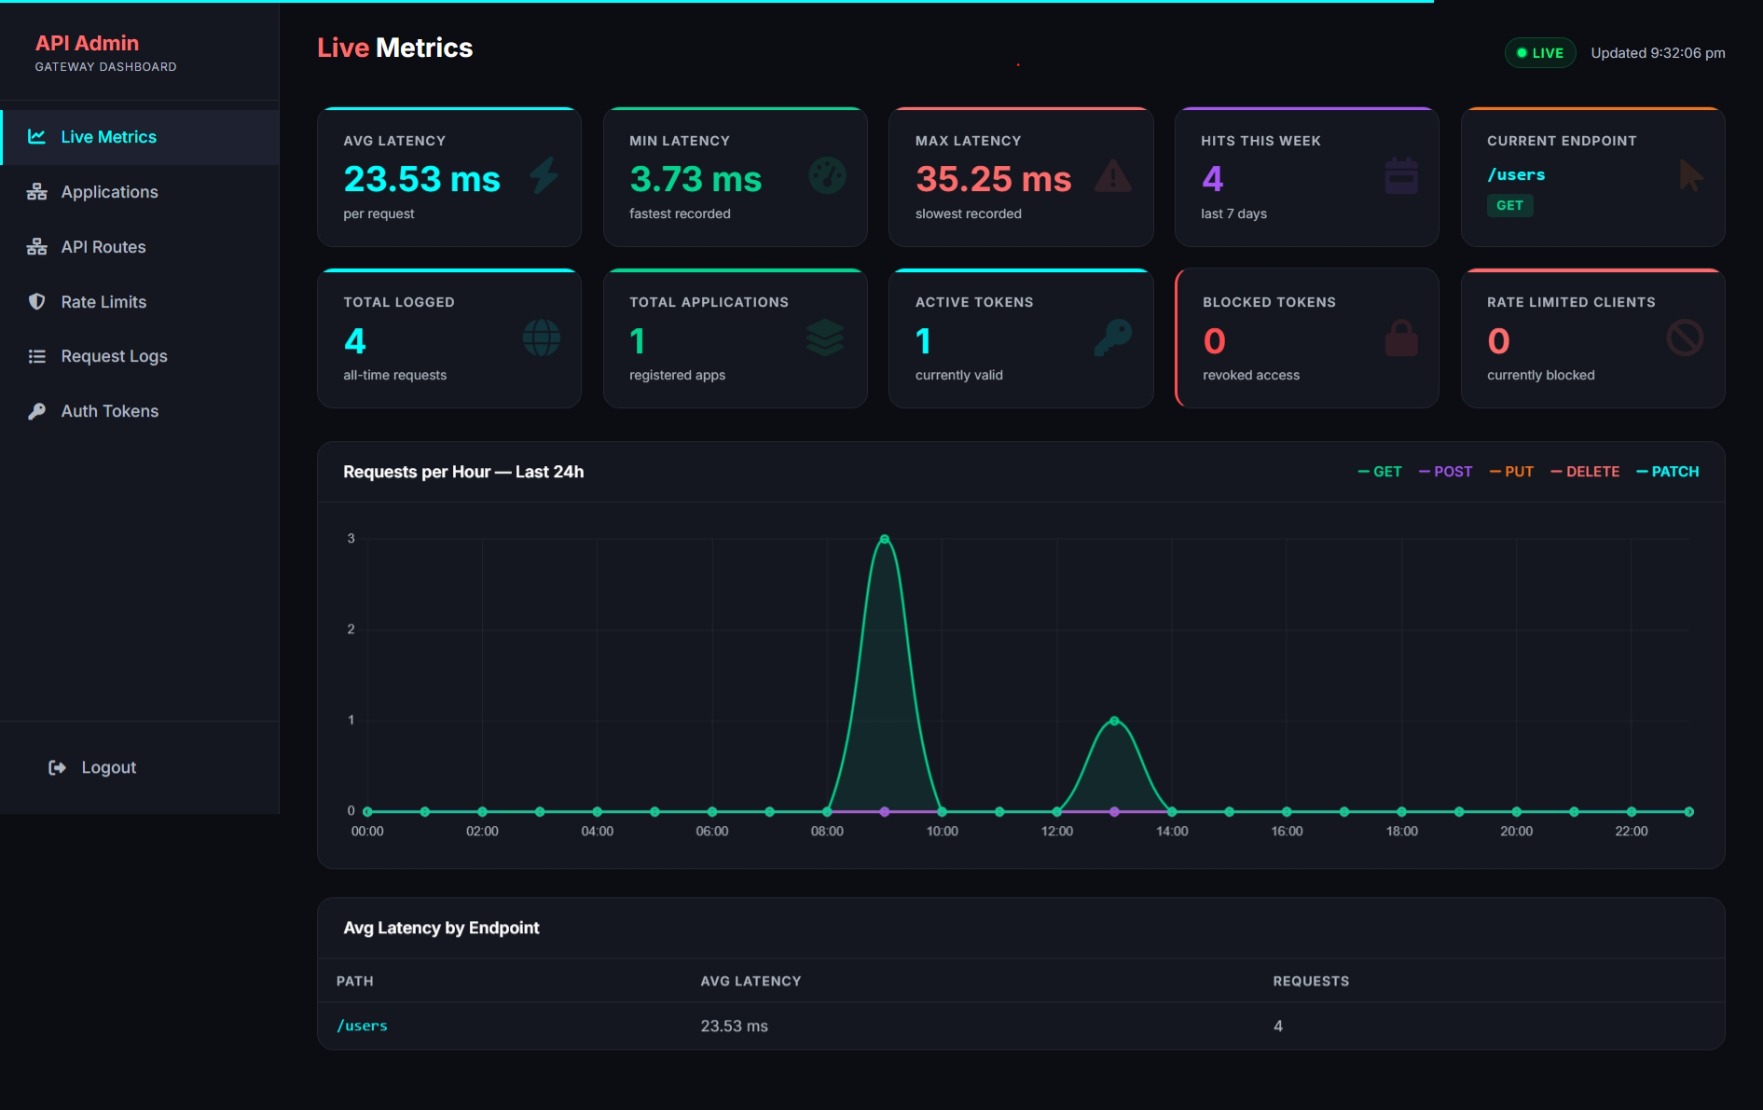
Live Traffic Analytics
Step 03
Register Applications
- Create Tenant Profiles Go to the "Applications" tab. Here you define the clients or internal services that are permitted to use your APIs.
- Assign Identifiers Provide a descriptive Application Name. The system auto-generates a unique Tenant ID which clients must pass in their headers.
- Toggle Access States You can easily suspend compromised or inactive applications by setting their status to "Blocked," rejecting their traffic at the gateway instantly.
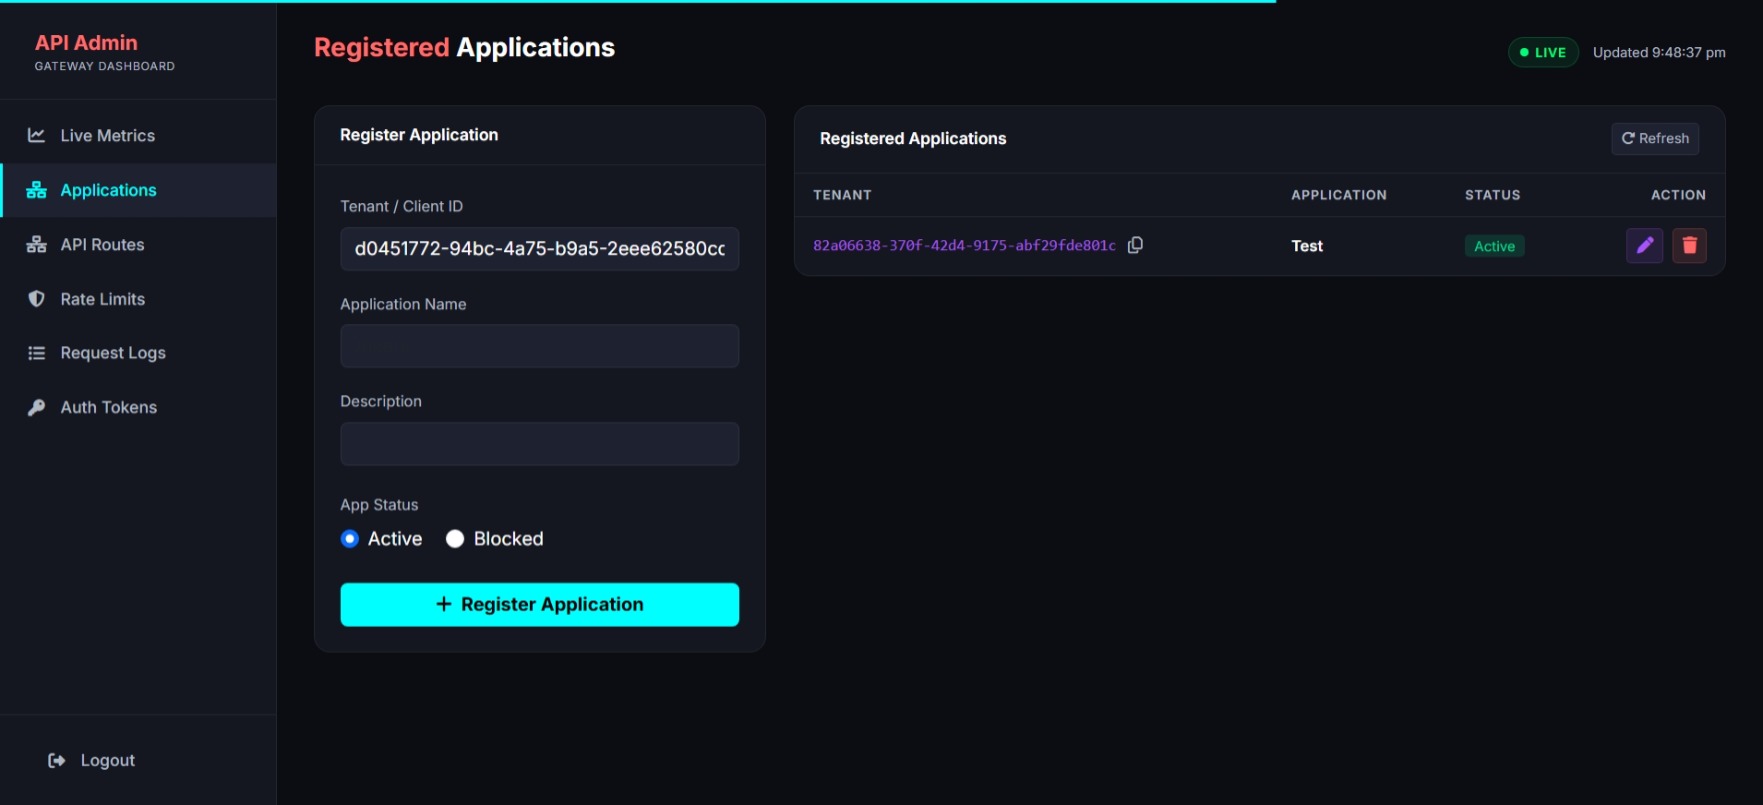
Tenant Management Panel
Step 04
Configure API Routing
- Select the Consumer In the "Routes" tab, identify the Tenant ID you are mapping upstream services for.
-
Define Incoming Paths
Specify the public-facing URL path (e.g.,
/v1/users) that the client application will send requests to. -
Set Target Upstreams
Provide the absolute internal URL (e.g.,
http://internal-svc:8080/api/users). The Gateway will securely proxy traffic without exposing your internal architecture.
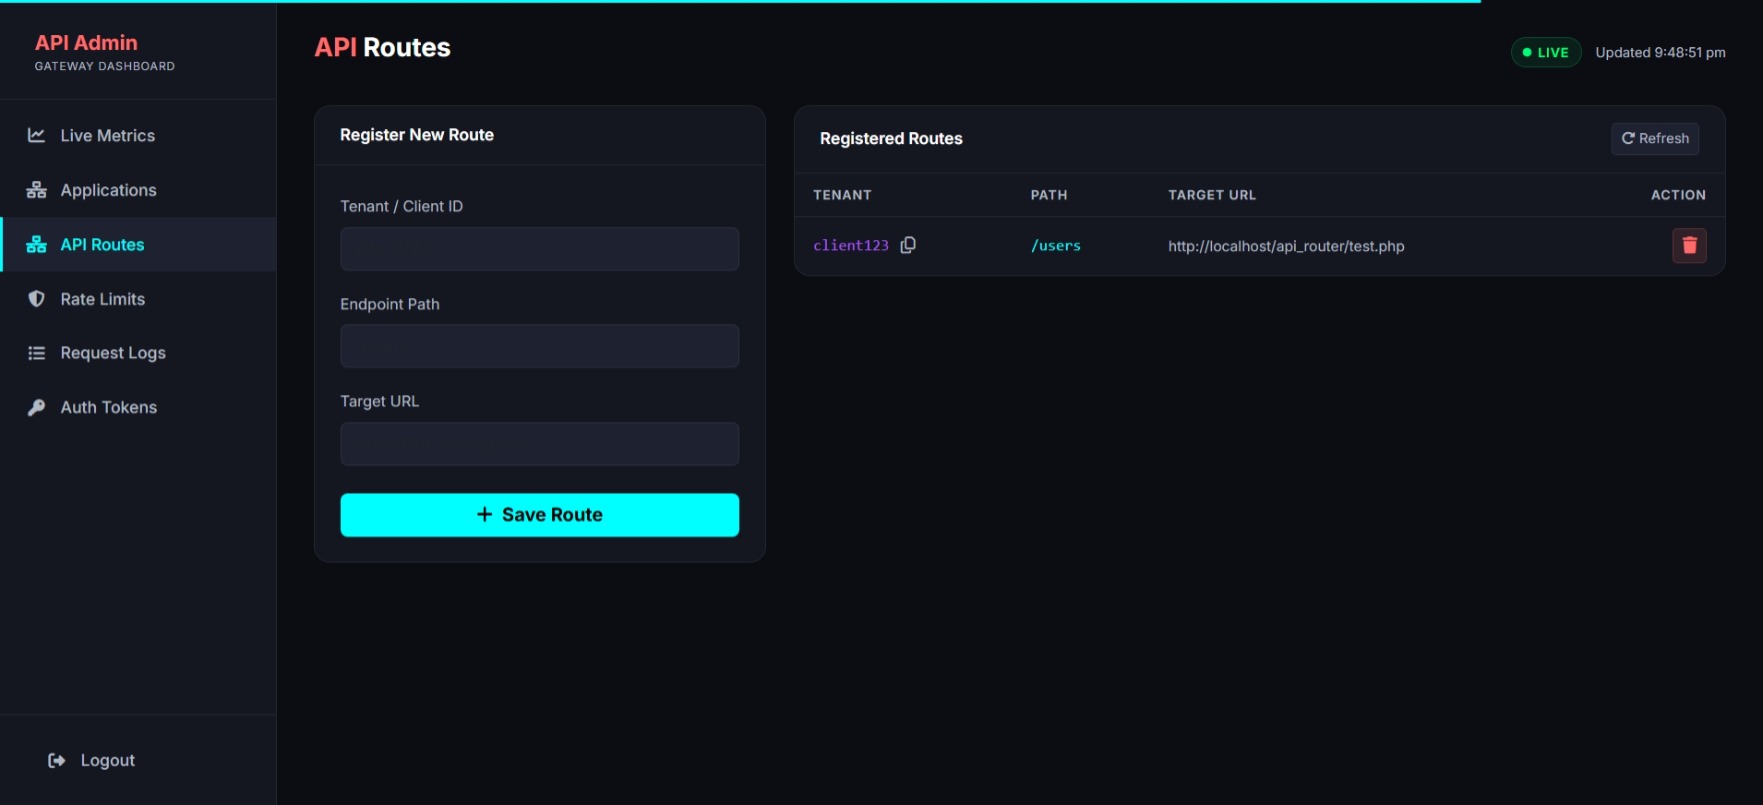
Route Configuration
Step 05
Client Rate Limiting
- Prevent Abuse Under the "Rate Limits" tab, you can assign maximum request quotas per client to protect your backend from DDoS or abuse.
- Visual Progress Tracking The dashboard features dynamic progress bars. As clients approach their limit, the bars transition from green to warning orange, and finally critical red.
- Dynamic Resets Counter resets can be done manually with a single click, or quotas can be upgraded on the fly without system downtime.
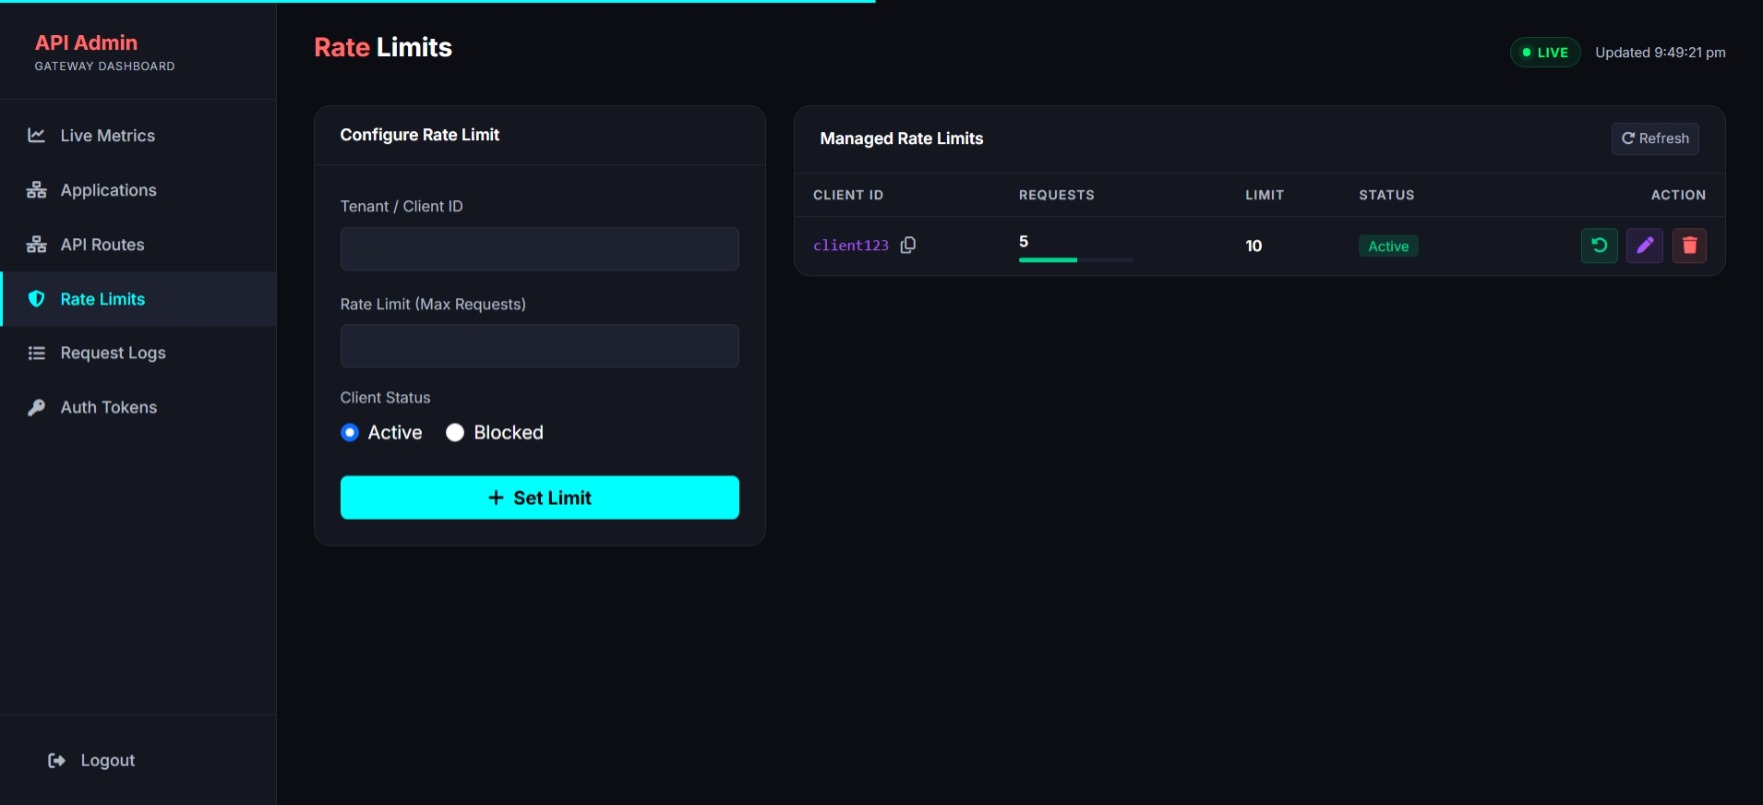
Quota and Rate Limit Interface
Step 06
Authentication Tokens
- Issue Bearer Keys Navigate to the "Auth Tokens" tab to generate secure 32-character hexadecimal Bearer tokens for API consumers.
- Set Token Constraints You can apply hard expiry dates and isolated token-level rate limits distinct from global client limits.
- Instant Revocation If a token leaks, simply edit the token and flip its status to "Blocked". The gateway will immediately issue 403 Forbidden responses.
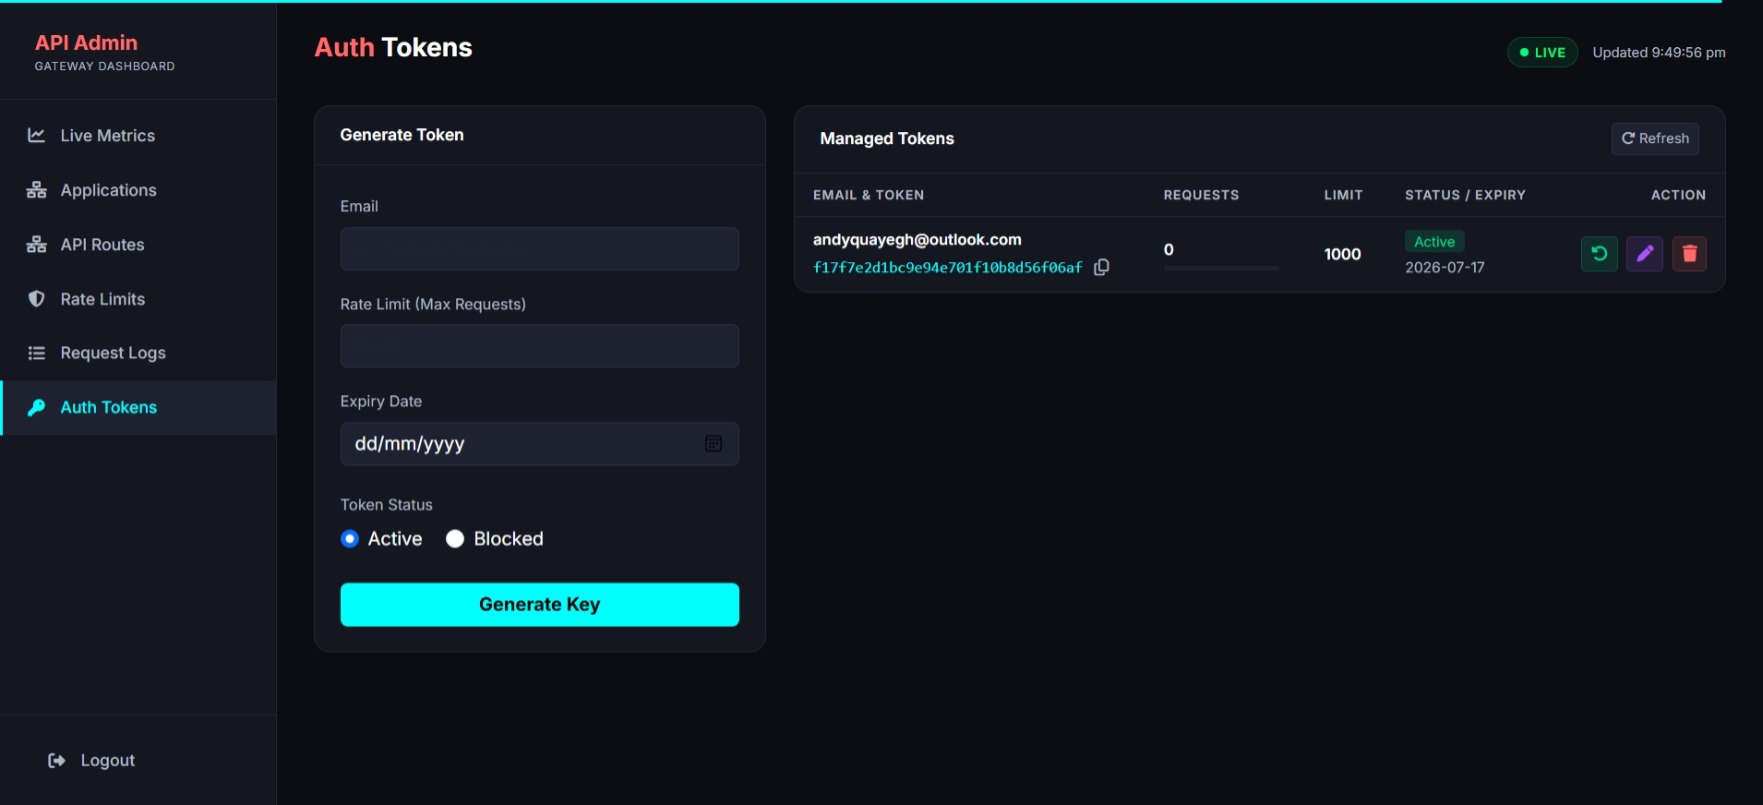
Bearer Token Issuance
Step 07
Trace & Debug Logs
- Live Stream Monitoring The "Logs" tab surfaces the 100 most recent network requests that have traversed your API Gateway.
- Audit Trail Each entry records the exact timestamp, the Client ID, the HTTP Method (GET, POST), and the endpoint Path.
- Performance Auditing Use the millisecond latency logs to find bottlenecks. Exceptionally slow requests stand out, allowing you to optimize specific routes.
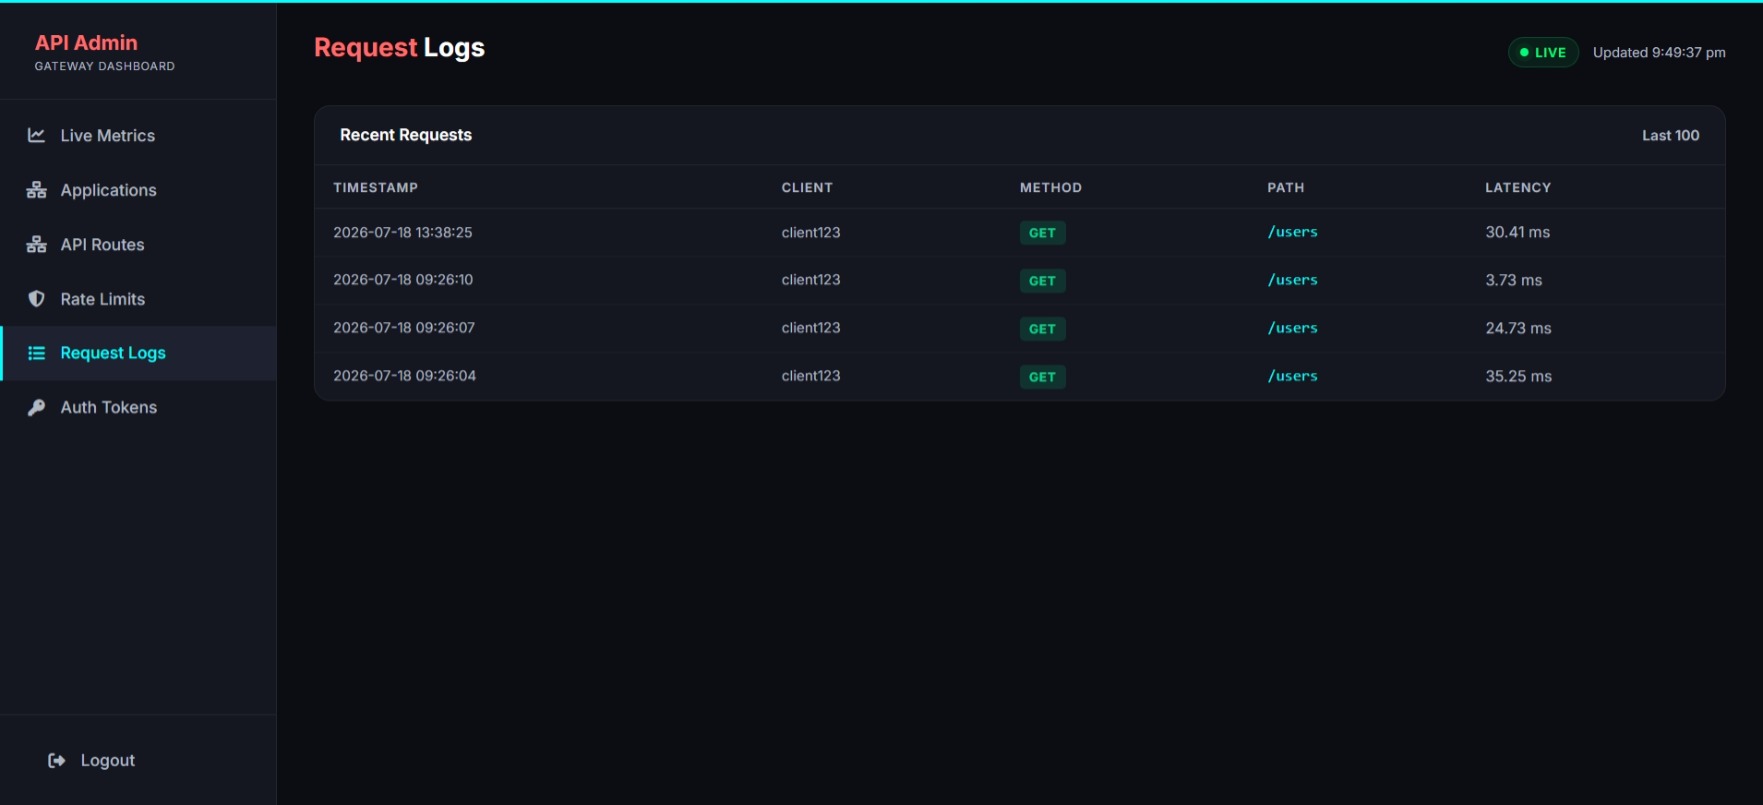
Historical Request Tracing